
P2.9 Rental LED Display Assembly Guide: Step-by-Step Installation for Fast, Safe Setup
Published: July 2026 | Reading time: 15 min | UnifyLED Engineering Team
Assembling a P2.9 rental LED display is not simply about connecting cabinets — it is a precision engineering workflow where every lock, every cable route, and every seam adjustment directly impacts the final image quality and structural safety of the installation. Whether you are deploying a 6m×4m stage backdrop for a concert, a curved screen for a corporate keynote, or a multi-panel wall for an outdoor festival, the assembly methodology determines whether the display looks seamless and stays secure throughout the event. This P2.9 rental LED display assembly guide provides the complete step-by-step procedure, from pre-assembly planning through post-show pack-down, based on field experience from thousands of rental deployments worldwide.
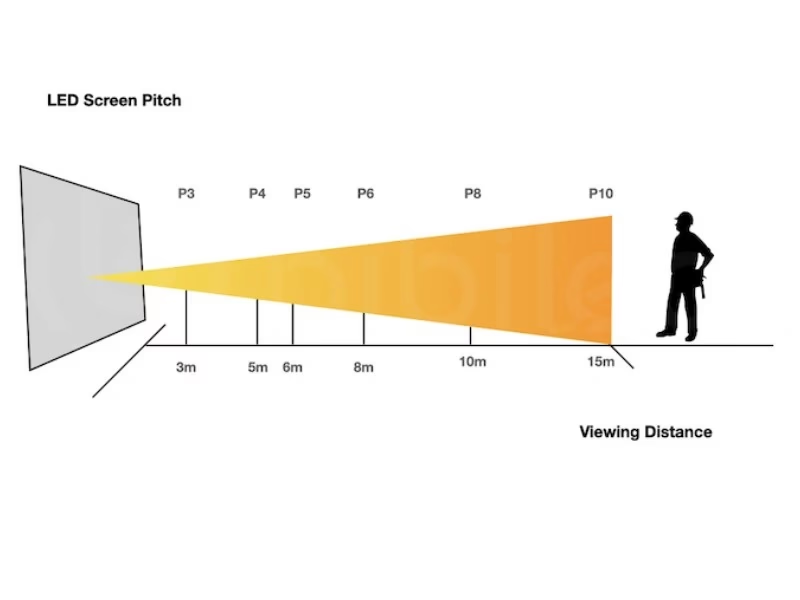
The P2.9 pixel pitch occupies a strategic position in the rental LED market. At approximately 2.97mm between pixel centers, it delivers 112,896 pixels per square meter — sufficient for clear HD content at viewing distances of 3–8 meters, which covers the vast majority of LED screen for events applications. The 500×500mm cabinet form factor, typically weighing 6.5–7.5 kg per panel, represents the industry standard for rental systems because it balances manageable single-operator handling weight with efficient coverage per cabinet (0.25 m²). Combined with die-cast aluminum construction and fast-lock mechanisms, this form factor enables rapid assembly and disassembly cycles that define rental profitability. For detailed guidance on physical setup workflows, see our LED screen installation resource.
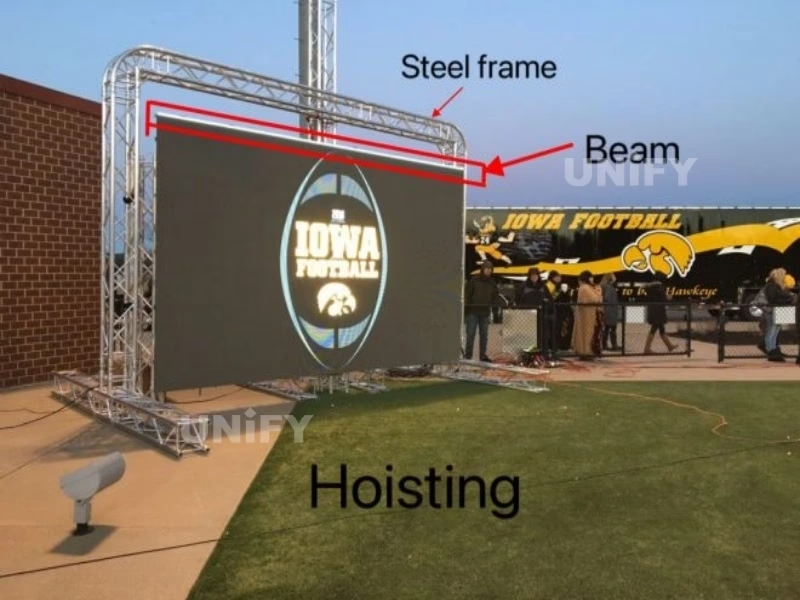
What Preparation Is Needed for P2.9 Rental LED Display Assembly? Pre-Assembly Guide
The difference between a 2-hour assembly and a 6-hour assembly is almost always decided before the first cabinet leaves its flight case. Proper preparation eliminates the most common on-site delays: missing cables, mismatched cabinet counts, unexpected power constraints, and structural incompatibilities.
1.1 Site Survey — Venue Dimensions, Power & Viewing Geometry
Before loading the truck, document the venue’s physical parameters. Measure the available installation footprint — width, height, and depth — accounting for any obstructions such as lighting trusses, HVAC ducts, or architectural features. Calculate the required screen dimensions based on the event’s LED display viewing distance: for P2.9, the optimal viewing range is 3–8 meters, which means the screen height should be approximately 1/3 to 1/6 of the furthest audience distance for comfortable viewing. Verify that the venue provides sufficient AC power — a fully loaded P2.9 rental wall typically draws 270W/m² average, 810W/m² peak. A 6m×4m (24 m²) display therefore requires approximately 6.5kW average / 19.4kW peak of available AC power, distributed across multiple circuits to avoid single-point overload.
1.2 Tools & Equipment Checklist
Every P2.9 rental assembly crew should arrive on-site with the following minimum toolkit: rubber mallet (for minor cabinet alignment adjustments without damaging aluminum edges), digital level (for verifying horizontal and vertical alignment during assembly), multimeter (for checking DC voltage at module terminals — target 4.8–5.2V), spare Cat6 Ethernet cables (minimum 4× of various lengths), spare power cables and IEC splitters, spare receiving cards (at least 2×), NovaLCT-loaded laptop with USB Type-B cable, and a calibrated straightedge with feeler gauge for flatness verification (target ≤0.1mm over 600mm span per IEC 60721-3-3).
1.3 Cabinet Inventory & Pre-Flight Inspection
Count every cabinet against the manifest before departure. A P2.9 rental screen configured at 6m×4m with 500×500mm cabinets requires 12 columns × 8 rows = 96 cabinets. Always pack 2–4 spare cabinets for rapid swap in case of handling damage. Before loading, perform a rapid visual inspection of each cabinet: check fast-lock levers for smooth operation (stiff or jammed locks should be lubricated or replaced before the event), inspect module surfaces for dead pixels or physical cracks, verify that all magnetic modules are fully seated, and confirm that each cabinet’s signal and power connectors are clean and undamaged. A 15-minute pre-flight inspection prevents hours of on-site troubleshooting.
How Is P2.9 Rental LED Display Assembly Architecture Structured? Cabinet Breakdown
A P2.9 rental LED display is not a single panel — it is a modular matrix of individually framed cabinets, each containing LED modules, a receiving card, a power supply, and interconnection hardware. Understanding each component’s role in the assembly process is essential for efficient setup and accurate troubleshooting. For a comprehensive overview of LED screen cabinet types and specifications, see our dedicated guide.
2.1 500×500mm Die-Cast Aluminum Cabinet Anatomy
The standard P2.9 rental cabinet is a 500mm × 500mm die-cast aluminum frame weighing 6.5–7.5 kg. Die-casting — injecting molten aluminum into a precision-machined steel mold under high pressure — produces cabinets with dimensional tolerance of ±0.1mm across all six faces. This precision is not cosmetic: when 96 cabinets are assembled into a 6m×4m wall, the cumulative tolerance stack must remain below the threshold of visible seam visibility (approximately 0.3mm gap width at a 3-meter viewing distance). Die-cast aluminum also provides the structural rigidity needed for hanging installations where the bottom row of cabinets must support the weight of all rows above it without deformation.
2.2 Fast-Lock Mechanisms — The 0.5-Second Connection
The fast-lock system is the defining assembly feature of modern rental LED cabinets. Located at the cabinet edges — typically two locks per side on a 500×500mm cabinet — the mechanism consists of a cam-lever actuator driving a locking pin into a receiver plate on the adjacent cabinet. When the lever is rotated 90° from open to locked position, the cam geometry applies approximately 200–300N of clamping force, pulling the two cabinet faces into flush alignment. The lock cycle takes approximately 0.5 seconds per connection. A single operator can lock two adjacent cabinets in approximately 3 seconds: align the edges, push the cabinets together until the receiver plates engage, then rotate each lock lever to the closed position. The lever’s over-center cam design prevents accidental unlocking from vibration — a critical safety feature for hanging installations.
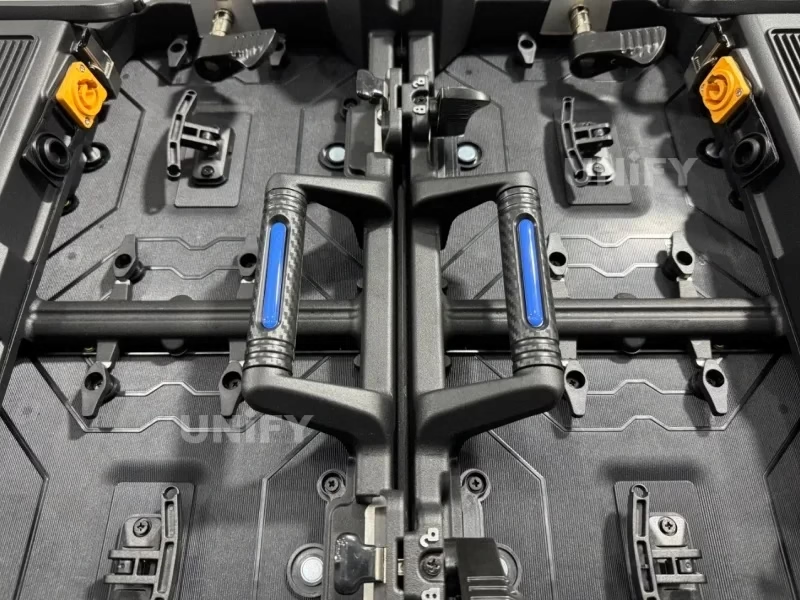
2.3 Panel Splicing Connector Plates & Signal Routing
Between adjacent cabinets, panel splicing connector plates provide the electrical interconnection for power and data signals. These plates — typically located on the top and right edges of each cabinet — contain multi-pin connectors that carry DC power (5V and GND rails) and differential data signals (RJ45-based Ethernet protocol) to the next cabinet in the chain. The connector plates are designed to mate automatically when cabinets are brought into alignment; no separate cable connection is required between adjacent cabinets. This “blind-mate” design eliminates exposed cables across the rear face of the assembled wall, reducing both setup time and cable-related failure points. For the signal path from the controller to the first cabinet, standard Cat6 Ethernet cables connect to RJ45 input ports on the receiving card, typically accessible from the rear of the cabinet.
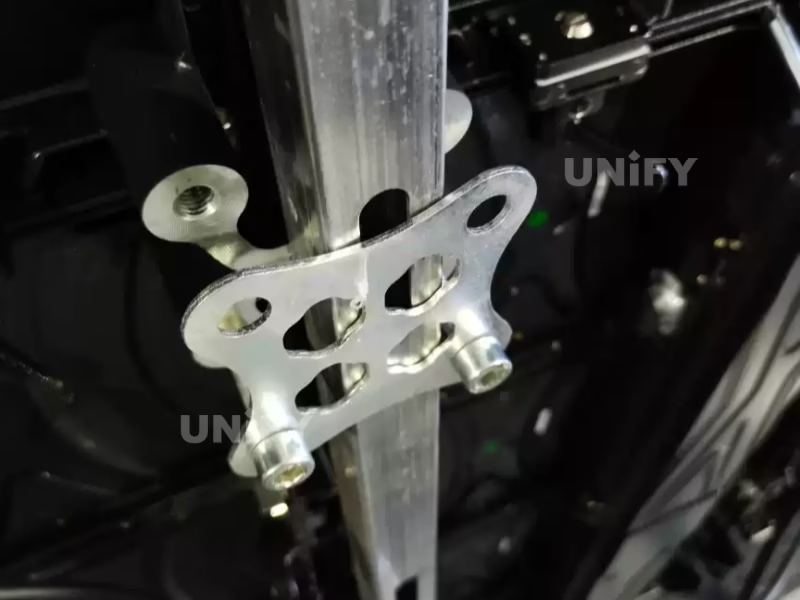
How to Assemble P2.9 Rental LED Display: Step-by-Step Assembly Guide
The following procedure assumes a standard 500×500mm P2.9 die-cast aluminum rental cabinet with fast-lock mechanism, assembled on a ground-support (stacked) configuration with leveling feet. The principles apply identically to hanging installations, with the addition of rigging attachment steps covered in Section 5. The UnifyLED assembly demonstration below covers the complete workflow.
UnifyLED — UnifyLED — Step-by-Step LED Display Assembly Guide (5 Steps)
Position Base Cabinets on Ground Support
Place the ground-support stands or truss bases at the marked positions. Set the first row of cabinets onto the support rails, starting from the center column and working outward in both directions. This center-out approach ensures symmetrical alignment — starting from one edge can accumulate alignment errors toward the far end. Use a digital level to verify horizontal alignment within ±0.5° before locking any cabinets together.
Lock Cabinets Row by Row
Working from the center column outward, push each adjacent cabinet into position until the connector plates engage and the edges align. Rotate each fast-lock lever 90° clockwise to the locked position — you should feel a firm resistance followed by a distinct seating click as the cam crosses its over-center point. On a 500×500mm cabinet with two locks per side, lock the top connection first (it carries tension load in hanging configurations), then the bottom. After locking each row, inspect visually for uniform edge alignment before moving to the next row.
Route Cables Through Mounting Channels
P2.9 rental cabinets include built-in cable routing channels on the rear frame. Run Ethernet signal cables from the sending card to the first cabinet in each signal chain, then daisy-chain through the connector plates to subsequent cabinets. Route AC power cables through dedicated channels, keeping them physically separated from signal cables by at least 5cm to minimize electromagnetic interference. For a 6m×4m display, plan for 4–6 independent power circuits to stay within the 15A per-circuit safety limit. For controller configuration details, see LED display configuration and system debugging.
Verify Flatness & Adjust Seams
Once all cabinets are locked and cabled, check the assembled wall for flatness. Place a calibrated straightedge across cabinet seams and measure gaps with a feeler gauge — the target is ≤0.1mm over a 600mm span. If a seam exceeds this tolerance, unlock the affected fast-locks, realign the cabinets, and re-lock. For minor adjustments (<0.2mm), use the cabinet leveling screws (typically 4× per cabinet, accessible from the rear) to micro-adjust individual cabinet positions without unlocking.
Power-On Test & Color Calibration
Apply power to all circuits sequentially — not simultaneously — to avoid inrush current tripping breakers. Once all cabinets are powered, connect the laptop via USB to the sending card and launch NovaLCT. Verify that all receiving cards are detected and reporting normal status. Send a full-white test pattern and visually inspect for dead pixels, color non-uniformity, or brightness variation across the wall. Run pixel-level calibration if the rental inventory has been updated since the last calibration. Set the LED display refresh rate to ≥3840Hz for camera-friendly performance. Verify that LED display power consumption matches expected values under test load.
When to Hang vs Stack: P2.9 Rental LED Display Assembly Installation Methods
P2.9 rental LED displays support two fundamentally different installation configurations. The choice affects assembly sequence, structural requirements, safety planning, and total setup time. The fast-lock mechanism is the same in both methods — what changes is the support structure and load path.
UnifyLED — UnifyLED — 0.5s Fast Lock Installation Demo on 500x500mm Rental Panel
4.1 Hanging (Rigging) — Best for Indoor Stages & Concerts
In a hanging configuration, the LED wall is suspended from an overhead truss, ceiling grid, or motorized hoist. The top row of cabinets attaches to a rigging bar via M10 or M12 bolts — never through the fast-lock mechanism alone. The rigger must verify that the overhead structure is rated for the full screen weight: a single P2.9 cabinet weighs approximately 7 kg, so a 6m×4m wall (96 cabinets) imposes 672 kg of static load, plus a dynamic load factor of 1.5× for indoor applications and 2.0× for outdoor wind exposure. The assembly sequence differs from stacked installation: cabinets are typically assembled row by row from the bottom up, with each row lifted and locked to the row above it. Hanging installations provide the cleanest visual presentation (no visible ground support) and maximize audience sightlines, but require certified rigging personnel and venue approval.
4.2 Stacked (Ground-Support) — Best for Outdoor & Long-Term Deployments
Stacked installation places all cabinet weight onto the ground through a braced truss or scaffold structure. No overhead rigging is required. The assembly builds from the bottom row upward, with each row locked to the row below. The ground-support frame typically includes leveling feet to compensate for uneven terrain — adjust these before placing the first row of cabinets. Stacked installations are inherently more stable in windy conditions because the weight vector points downward into the ground rather than pulling against overhead attachment points. The trade-off: the ground-support structure is visible and occupies additional depth (typically 1–2 meters behind the screen). For outdoor deployments exceeding 72 hours, a stacked configuration with wind bracing is the standard recommendation.
How to Verify P2.9 Rental LED Display Assembly: Post-Assembly Quality Checklist
Assembly is not complete when the last cabinet is locked. Three quality verification steps ensure the display performs reliably throughout the event and survives the deployment without damage.
5.1 Flatness Calibration
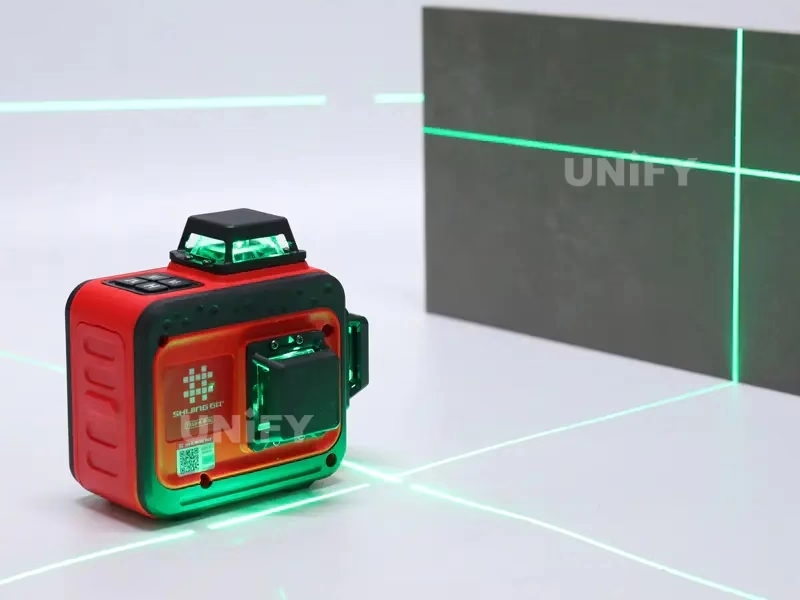
Cabinet-to-cabinet flatness deviation of more than 0.3mm creates visible seam lines that are particularly noticeable on bright, uniform content such as white backgrounds or sky gradients. Use a 600mm calibrated straightedge placed across cabinet seams and measure with a 0.1mm resolution feeler gauge. If any seam exceeds 0.3mm, unlock, realign, and re-lock the affected cabinets. For large walls (over 20 m²), repeat the flatness check at 5–8 points across the display area. The LED screen brightness uniformity is directly affected by flatness — even a 0.5mm misalignment creates a perceptible shadow line at typical viewing distances.
5.2 Waterproof Testing for Outdoor Deployments
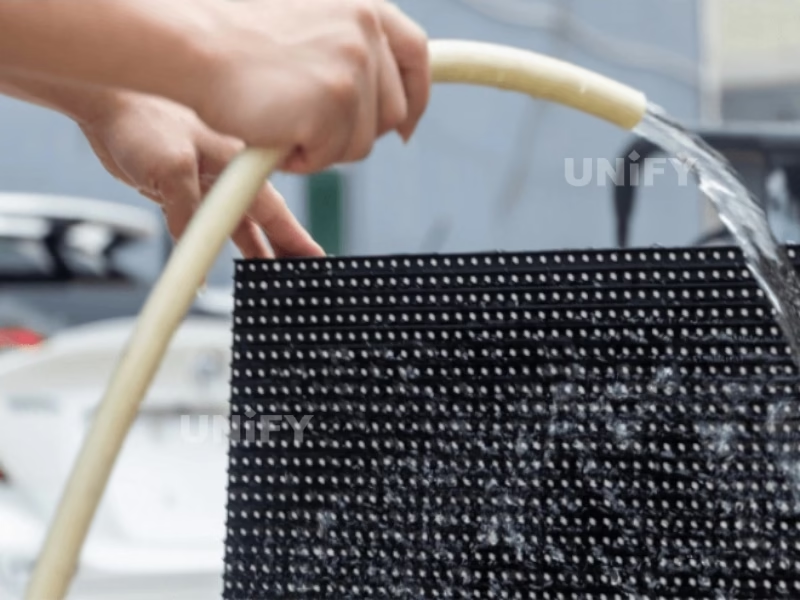
P2.9 rental cabinets rated IP65 (front) must be verified after assembly, especially if the cabinets have been in rental rotation and the gaskets may have experienced compression set. Conduct a controlled water spray test on a single cabinet before assembly — not on the assembled wall — to verify that the module gaskets and connector seals are intact. Pay particular attention to the cabinet-to-cabinet seam: the IP65 rating applies to individual cabinets, and the seam between cabinets relies on the compression of the silicone gasket strips. A poorly aligned seam can create a water ingress path. For outdoor events where rain is forecast, apply a secondary waterproof membrane tape over horizontal seams as a precaution.
5.3 Signal & Power Redundancy Check
For mission-critical events (live broadcasts, keynotes, concerts), verify that the controller supports Ethernet port redundancy and that backup signal paths are functional. With NovaStar sending cards, connect both Ethernet ports to independent signal chains. Physically disconnect one cable while the display is running — the screen should continue operating without interruption, and the controller’s RUN indicator should shift to breathing mode. For power redundancy, verify that each power supply unit (PSU) is loaded to no more than 80% of its rated capacity (e.g., a 200W PSU should drive no more than 160W of LED modules). This ensures that if one PSU fails, adjacent PSUs have headroom to absorb the additional load without tripping.
Why Proper Pack-Down Matters for P2.9 Rental LED Display Assembly Longevity
The rental business model depends on equipment longevity. A P2.9 rental cabinet that survives 200 events before requiring refurbishment generates significantly more revenue than one damaged after 50 events due to careless pack-down. For ongoing LED screen maintenance, proper pack-down discipline is essential.
6.1 Disassembly Order — Reverse the Build
Disassemble in the exact reverse of the assembly sequence: power down all circuits → disconnect and coil all external cables (power and Ethernet, sorted and labeled) → working from the top row downward, unlock each cabinet’s fast-lock levers → separate cabinets carefully, avoiding edge impacts → place each cabinet into its designated flight case compartment. Never stack cabinets without foam interlayers — the weight of three cabinets (approximately 21 kg) is sufficient to deform the LED modules on the bottom cabinet if foam protection is absent.
6.2 Cable Management & Flight Case Protocol
Coil each cable individually using the over-under technique (alternating coil direction to prevent cable twist). Secure with Velcro straps — never use adhesive tape, which leaves residue on connectors. Label each cable’s length and type for rapid identification at the next event. For flight cases: verify foam integrity before loading (compressed or torn foam does not protect), place heavier items (PSUs, rigging hardware) at the bottom of the case, and complete a visual inventory checklist against the manifest before sealing. A 0.3% annual loss rate on cables and accessories is typical for well-managed rental fleets — rates above 1% indicate pack-down process failures.
FAQ: P2.9 Rental LED Display Assembly Guide – Common Questions
Why the P2.9 Rental LED Display Assembly Guide Matters for Rental Success
The P2.9 rental LED display assembly process is a repeatable engineering workflow that, when executed correctly, produces a seamless, safe, and reliable display in under three hours for a standard 6m×4m configuration. The critical success factors are: pre-assembly preparation (venue survey, tool checklist, cabinet inspection), disciplined assembly sequence (center-out, row by row, lock before cabling), post-assembly quality verification (flatness, waterproofing, signal redundancy), and careful pack-down (reverse order, proper cable coiling, foam-protected flight cases).
The 500×500mm P2.9 die-cast aluminum cabinet with fast-lock mechanism represents the current state of the art for rental LED systems — balancing handling weight, assembly speed, structural integrity, and image quality. The fast-lock mechanism alone reduces assembly time by approximately 40% compared to screw-fastened cabinet designs, which directly impacts rental fleet profitability. For integrators and rental companies investing in P2.9 inventory, the difference between a profitable rental operation and a loss-making one often comes down to assembly discipline — every minute saved on setup is a minute available for revenue-generating event time.
Need Rental LED Display Solutions?
UnifyLED provides P2.6–P4.8 rental LED cabinets with fast-lock assembly, factory-direct pricing, and global delivery. Free assembly training with every order.
legidatechled@gmail.com | +86-191-18802497