Download-Huidu System
UnifyLED specializes in mid-to-high-end LED display solutions and maintains close partnerships with internationally renowned control system manufacturers such as Novastar and Huidu, ensuring stable support for our customers’ projects.
Here, you can conveniently browse and download official documentation and materials for selected control systems, including user manuals, software drivers, and configuration guides, helping you quickly get started and resolve installation and commissioning issues in a one-stop manner.
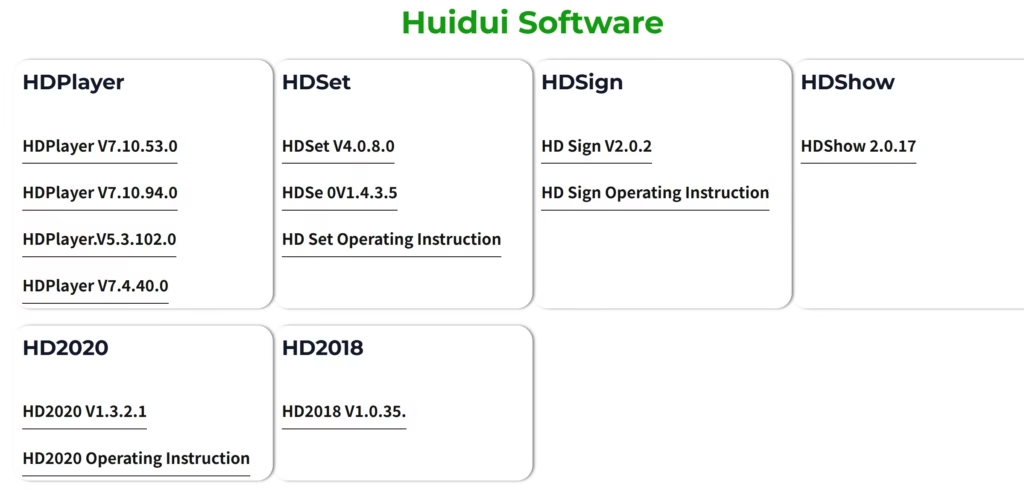
Huidui Software
HD2018
Huidu Multimedia Player
Huidu Control System-Synchronous Controller
Huidu Control System-Receiving Card
Huidu Control System-Video Processor
LED Screen Inquiry
Huidu Software Installation and Usage Guide
Introduction
In Unify’s indoor LED display projects, particularly the Ehonor series, Huidu software (e.g., HDPlayer and HDSet) is the core tool for controlling the screens. The following guide provides a comprehensive guide, from installation to initial use.
HDPlayer / HDSet Software Installation Steps
1. Download the Installation Package
Before installing, we recommend that you first visit the Unify Download Center and find the latest official Huidu software installation package. Ensure a stable network connection during the download to avoid installation failures due to network outages or file corruption.
The installation package is typically provided as a compressed file (such as a .zip or .rar file). Be especially careful not to cancel or pause the download if the file is large. After the download is complete, verify the file size or use a decompression tool to verify the integrity of the installation package.
2. Unzip and Run
Save the downloaded compressed package to a local drive on your computer and unzip it. For ease of reference, we recommend selecting a fixed directory, such as C:\Huidu\HDPlayer or C:\Huidu\HDSet. After unzipping, you will see the installer (usually in .exe format) in the corresponding folder. Right-click the installer and select “Run as Administrator.”
This will prevent installation errors such as “Unable to write to system files” or “Installation interrupted” due to insufficient permissions, ensuring that both the software and drivers are correctly written to the system directory.
3. Installation Process Selection
Once you enter the installation interface, follow the prompts. You will first be asked to select an installation directory. If you do not have specific requirements, use the default system path. If you have multiple hard drives, it is recommended to install the software on the larger partition.
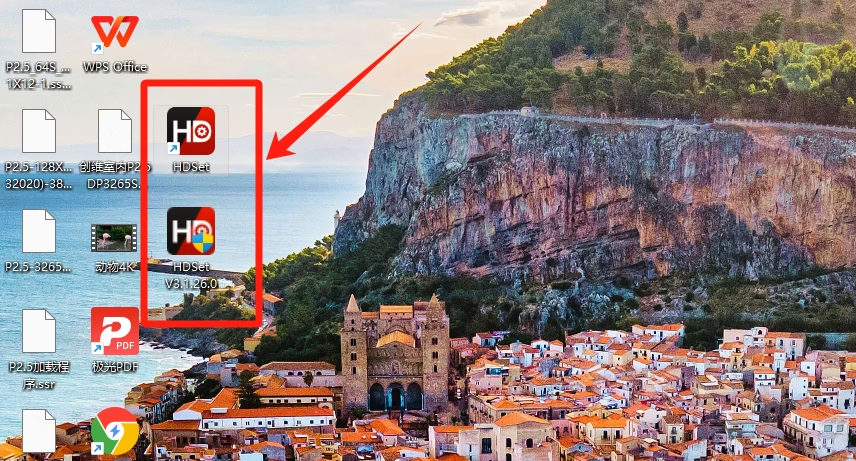
Next, you can select the “Create desktop shortcut” option. This will automatically create an icon on the desktop after the installation is complete, making it easy to launch the software later.
During the installation process, the software will automatically detect and install the necessary drivers and dependent components (such as USB drivers and communication module support packages).
These components are critical for ensuring that the control and receiving cards are properly recognized by the computer. Therefore, please wait until the installation is complete and do not interrupt the installation process.
4. Completing the Installation and Restarting
After all files have been copied and the driver installation is complete, the installer will display the “Installation Completed” message. In some cases, you may be prompted to restart the computer.
We strongly recommend that you restart the computer as the drivers and services will not take effect until the system is reloaded. If you skip the restart, the software may launch but fail to connect to the device.
After the restart is complete, you will see a shortcut to HDPlayer or HDSet on the desktop. You can double-click it to open the software and enter the subsequent debugging and program editing process.
2. Initial LED Screen Connection Procedure
1. Hardware Connection Check
When commissioning an LED display for the first time, first confirm that all hardware connections are correct. Ensure that the HD-A / HD-R control card and LED modules are connected according to the wiring diagram and that a stable power supply is available to prevent display abnormalities caused by insufficient voltage or loose connections.
Depending on the control card model, you can choose to establish communication between the computer and the control card via Ethernet or USB. Ethernet connections are suitable for long-distance transmission and provide greater stability, while USB is more suitable for close-range commissioning.
During this check, ensure that the network cable is securely plugged in and that the power supply is stable and uninterrupted. These details can effectively prevent subsequent device recognition issues.
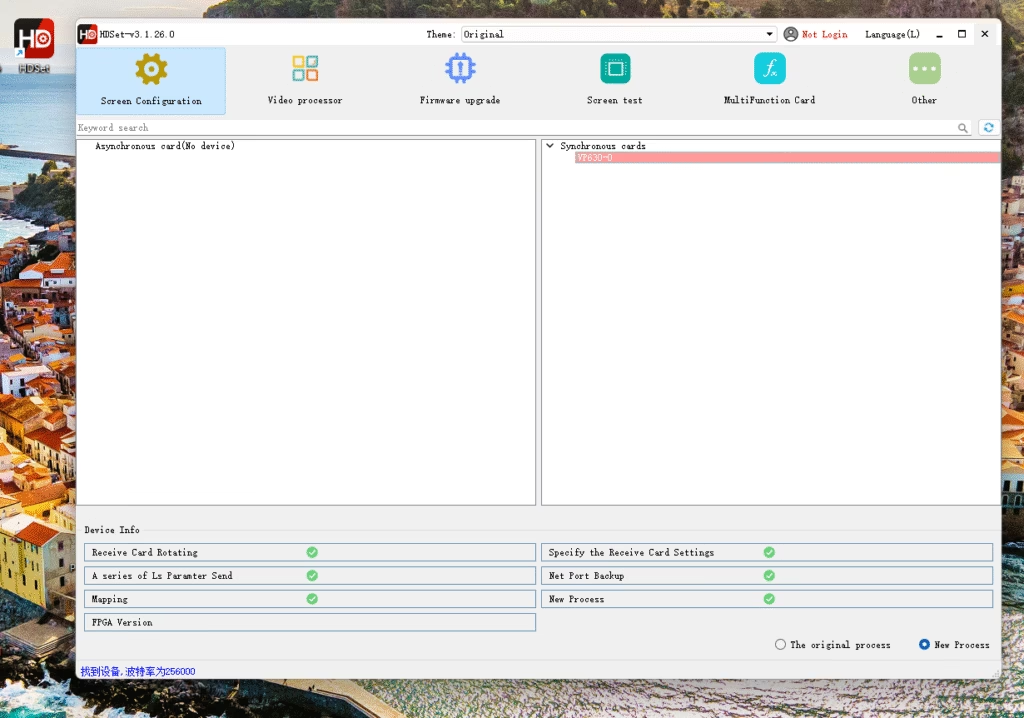
2. Software Device Identification
After completing the hardware connection, open HDPlayer or HDSet software, enter the device management interface, and click “Search Device” or “Auto Identify.” The software will automatically scan for control cards in the current network or USB interface and display information such as the device model, IP address, and firmware version.
If the device is successfully recognized, the basic connection has been successfully established. If the software still cannot detect the device, you need to check the network cable for damage, whether the IP addresses of the computer and the control card are on the same network segment, and whether the operating system’s firewall or antivirus software is blocking communication.
By troubleshooting each issue, most identification issues encountered by beginners during first-time use can be resolved.
3. Screen Mapping and Resolution Setting
After the device is successfully recognized by the software, the next step is to configure screen mapping and resolution. This process determines whether the LED display can accurately reproduce content and is one of the most critical steps in the debugging process.
Screen Mapping Operation
Users need to configure the corresponding module combination in the software based on their actual tile layout. For example, a 2×2 tiled screen requires a 2-row, 2-column layout in the software, while a long, strip-shaped advertising screen commonly used on stage might use a 3×1 or 4×1 arrangement.
If the screen is composed of dozens or even hundreds of LED modules, the “Quick Mapping” function can be used to batch generate module layouts, eliminating the tedious drag-and-drop operation.
During the mapping process, carefully check the number and order of modules to ensure they match the physical tiled layout on site. Failure to do so may result in an inverted or misaligned image, or partial blackout of the screen.
Unify typically includes a mapping reference diagram when delivering the screen, allowing users to refer to it and significantly reducing the chance of errors.
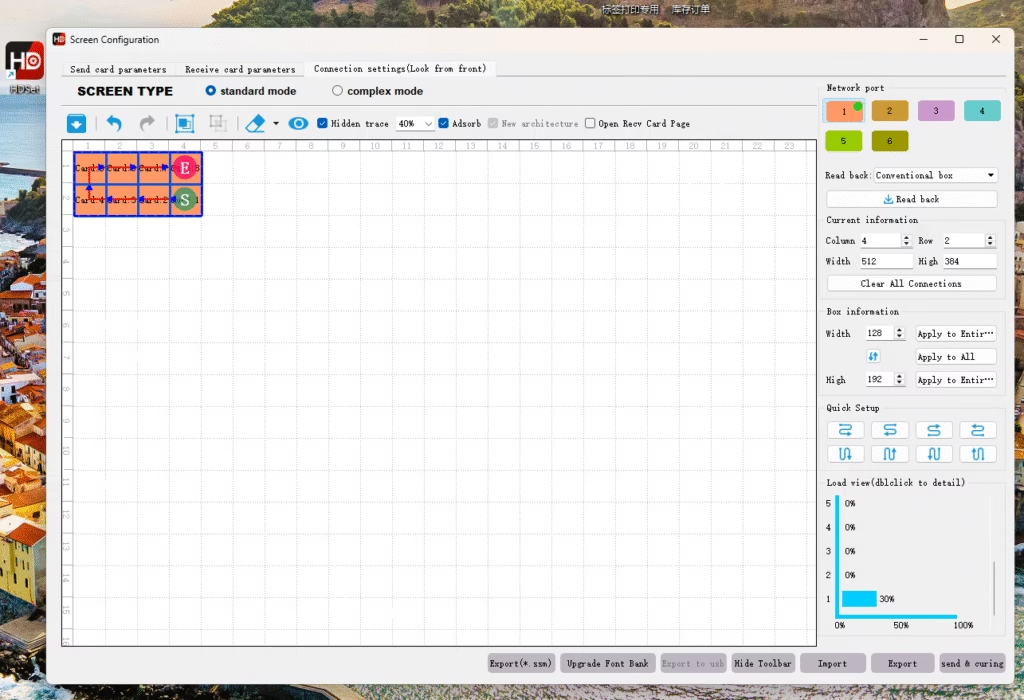
Resolution Setting
After mapping is complete, the screen resolution needs to be configured. The width and height of the resolution should be identical to the overall size of the tiled screen.
For example, if a P2.5 LED module measures 320×160 pixels and the site uses a layout of 6 wide and 4 high modules, the final resolution should be set to 1920×640 pixels.
If the resolution is not configured correctly, the screen may appear stretched or compressed, or portions of the content may be cropped, affecting the final display quality.
For novice users, it is recommended to directly load the factory preset configuration file provided by Unify. This will automatically match the optimal resolution and parameters, eliminating tedious calculations.
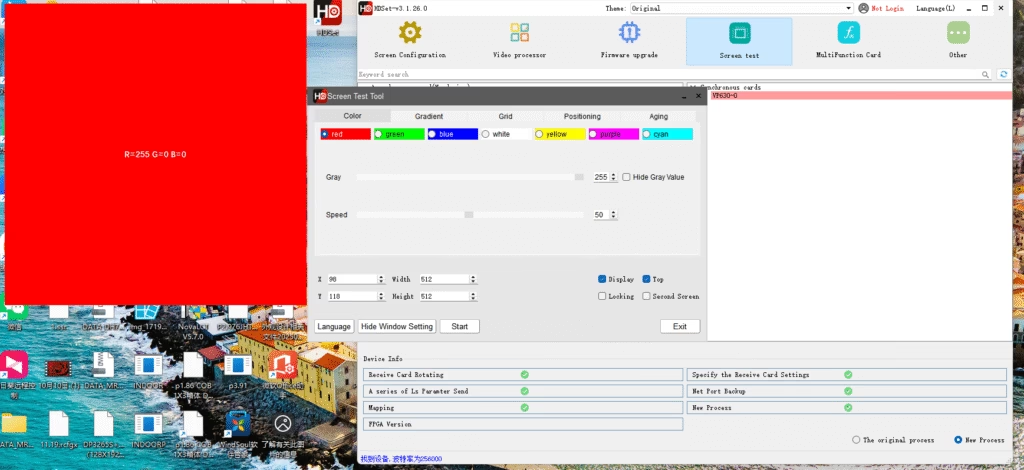
Verification and Test Screen
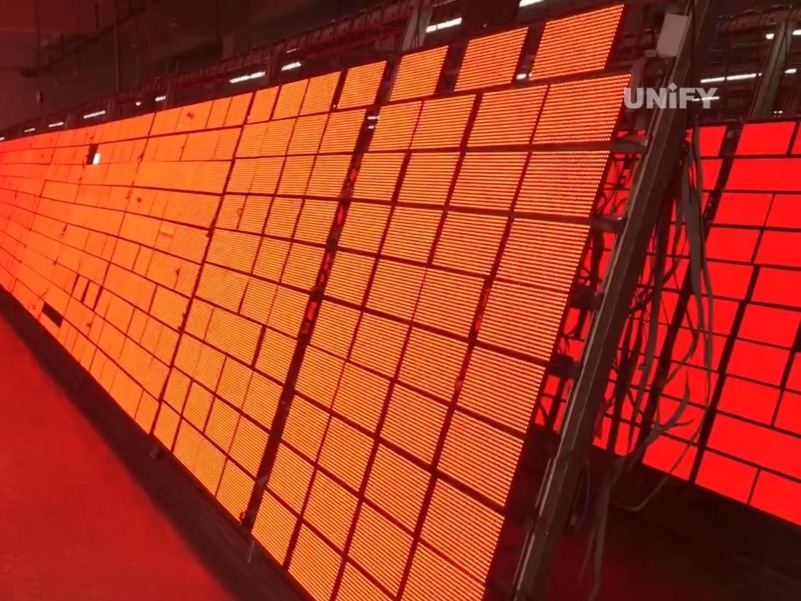
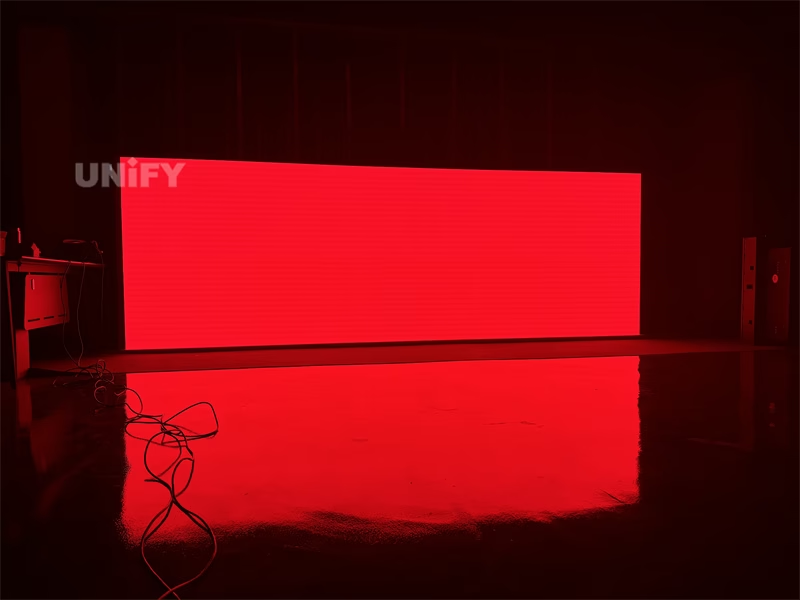
After completing the mapping and resolution configuration, the software will typically automatically power on the screen and display a test screen. Common test modes include solid red, green, and blue images, checkerboard contrast, and dynamic grayscale testing.
These test patterns allow you to quickly verify the module for issues such as color shift, dead light, or uneven tiled connections.
If the display is normal, the entire mapping and resolution configuration has been successfully completed. If an error occurs, return to the software to check the parameters or reload the preset file to make corrections.
Practical Tips
When mapping for the first time, try using the “Auto Layout” function to reduce the risk of manual errors.
For large screens, it’s recommended to map the screen in sections and then merge them into a unified layout for more intuitive operation.
After completing the resolution setting, save and back up the configuration file for quick recovery during maintenance or when replacing the control card.
Common Function Demonstration
1. Program Editing (HDPlayer)
HDPlayer allows users to easily create and edit programs. The software supports importing media content in a variety of formats, including images, videos, and text files. Using the intuitive timeline or playlist features, you can flexibly arrange the playback order and duration of different content.
For example, in a shopping mall advertising scenario, you could start with a promotional video, then switch to a new product image display, followed by a text scrolling announcement, creating a clear and organized flow.
HDPlayer also provides simple transition effects and text scrolling to make advertising content more vivid and capture the audience’s attention, making it ideal for high-frequency information displays such as advertising screens and bulletin boards.
2. Remote Distribution (HDPlayer / HDSet)
Both HDPlayer and HDSet support remote content distribution via Wi-Fi or a local area network. Users can send programs directly to LED screens from their office or control center, without having to visit the screens themselves, enabling quick updates.
This feature is extremely useful in applications such as shopping mall advertising screens, campus information screens, and corporate showrooms. It not only reduces frequent on-site operations but also improves the efficiency of content updates.
For example, some Unify customers use the remote publishing function to automatically push the latest promotional ads or campus announcements every morning, significantly reducing labor costs.
3. Scheduled Playback
The software’s built-in scheduled playback function allows users to pre-set program playback dates and times. For example, you can set a specific advertising video to play on a loop from 9:00 AM to 12:00 PM daily, automatically switch to a brand promotional video in the afternoon, and play holiday-themed content in the evening.
This function supports precise time periods for each day and week, and even allows for specific content to be replaced during holidays.
For notice boards in shopping malls, subway stations, or corporate buildings, scheduled playback fully automates content management, eliminating the need for tedious manual intervention.
4. Multi-Screen Management
Multi-screen management is particularly important in large-scale projects or video wall applications. Users can use the software to centrally control and manage multiple LED screens, ensuring that all screens display the same content simultaneously or play different content according to predefined zones.
Unify has enabled remote, unified multi-screen configuration for numerous large-scale indoor LED screen projects, helping clients easily manage dozens of video walls and ensuring stable and consistent playback.
Whether in stage performances, exhibition halls, or complex scenarios like airports and train stations, multi-screen management significantly improves operational efficiency and overall display quality.

Conclusion
This guide has explained the installation steps, hardware debugging methods, and common functions of the HUIDU control system.
In daily use, please follow the precautions in this document and combine them with the factory settings provided by Unify to significantly reduce operational errors and maintain optimal display quality on your LED display.
If you encounter any problems during installation or debugging, you can always visit the Unify Download Center to obtain the latest software and firmware, or contact our technical support team directly.
We will provide remote guidance and professional services to help you quickly resolve issues and ensure the smooth operation of your LED project.